How to Make a Blog Post
A resource for anyone wishing to build a better workflow when blogging with Ghost. Tips & Tricks and general advice.

This post is not meant to encourage you to start a blog, nor inspire you on how to select a topic on which to blog. Instead, I want to collect some of the mini-procedures I follow when constructing one of my blog posts. This includes useful keyboard shortcuts, online tools, and thought processes.
I will write pretty specifically to the experience of writing a blog post using Ghost on a Mac machine, but these instructions are easily adapted to other blog sites and machines.
Styling
The Ghost Blog works a lot like Markdown, where we can structure text in a very readable way using a few predefined sizes and a few special types of structures.
For instance, in order to create the section titles, I use the system of "number of pound symbols":
- Single
#represents heading sizeh1in HTML, i.e., appropriate for the title of the document. - Double
##represents heading sizeh2, something more appropriate for titles of the sections of a document. - Triple
###represents heading sizeh3, something appropriate for titling sub-sections. - Etc. until
######.
You can easily style a line of text in a given heading style by starting a new line, typing the pound symbol # as many times as you need, and then hitting the Space bar. I think this system is super clean, clear, and logical. It helps me keep track of my structure during the writing process as well.
Special Snippets
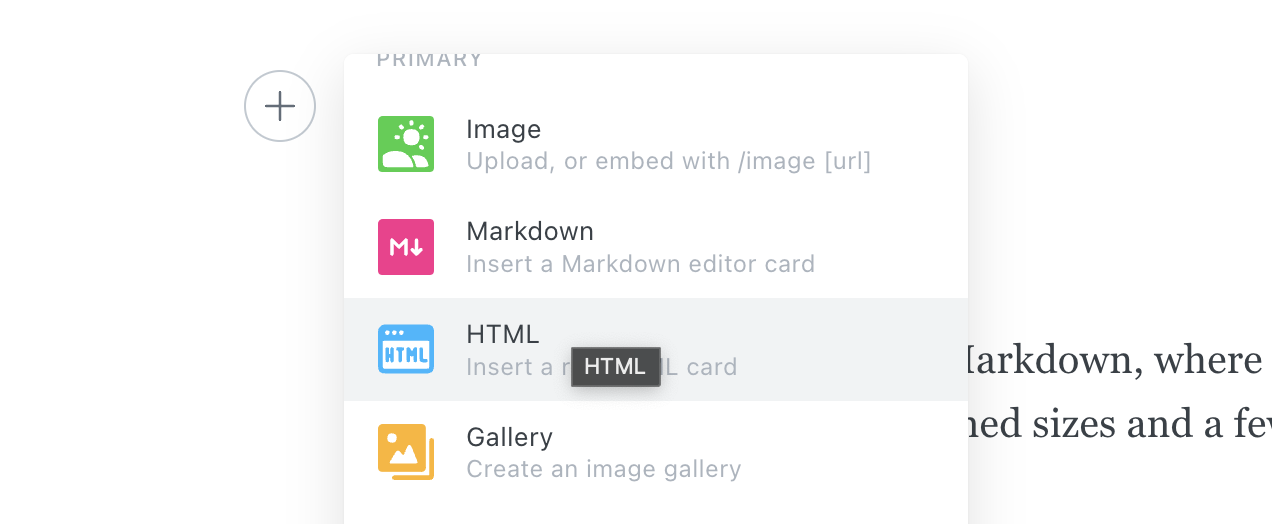
Ghost offers a lot of useful "Editor cards," or elements that you can include in your post. I believe their Editor cards page does a great job outlining just how many options are at your disposal. I will spend this section talking about some other, non-obvious features.
Code Snippets
Ghost has a few ways to include code. The simplest way to refer to a small piece of code would be to place some code in between tick marks (`). The output will look like this. If you'd like to include a longer string of code that spans multiple lines, it would be best to write a code block, which is written between a pair of triple tick marks (``` code ```).
You can specify the language of the code in the top right, but the styling provided by Ghost will not be that great. I like to include the following text in the Header and Footer of my post's HTML in order to stylize any code (works best for JavaScript).
<!-- Code Styling with Prism -->
<link rel="stylesheet" href="https://cdnjs.cloudflare.com/ajax/libs/prism/1.28.0/themes/prism-tomorrow.min.css" integrity="sha512-vswe+cgvic/XBoF1OcM/TeJ2FW0OofqAVdCZiEYkd6dwGXthvkSFWOoGGJgS2CW70VK5dQM5Oh+7ne47s74VTg==" crossorigin="anonymous" referrerpolicy="no-referrer" /><!-- Code Styling with Prism -->
<script src="https://cdnjs.cloudflare.com/ajax/libs/prism/1.28.0/components/prism-core.min.js" integrity="sha512-9khQRAUBYEJDCDVP2yw3LRUQvjJ0Pjx0EShmaQjcHa6AXiOv6qHQu9lCAIR8O+/D8FtaCoJ2c0Tf9Xo7hYH01Q==" crossorigin="anonymous" referrerpolicy="no-referrer"></script>
<script src="https://cdnjs.cloudflare.com/ajax/libs/prism/1.28.0/plugins/autoloader/prism-autoloader.min.js" integrity="sha512-fTl/qcO1VgvKtOMApX2PdZzkziyr2stM65GYPLGuYMnuMm1z2JLJG6XVU7C/mR+E7xBUqCivykuhlzfqxXBXbg==" crossorigin="anonymous" referrerpolicy="no-referrer"></script>You can insert this code into your own blog by clicking on the Post Settings at the top right, followed by Code injection, and then copying and pasting appropriately into either the Post header or Post footer.
There are lots of other options for stylizing, this was just easiest for me.
HTML
You can also include HTML cards, which will execute HTML code. I like to create interactive Canvases. You can try hovering your mouse on the canvas below.
The code I used to generate that Canvas is below:
<!DOCTYPE html>
<html>
<body>

<div style="text-align: center">
	<canvas id="interactiveCanvas" width="255" height="255" style="border:1px solid #d3d3d3;"></canvas>
</div>

<script>
    // The canvas element
    var c = document.getElementById("interactiveCanvas");
    // The context of the canvas
    var ctx = c.getContext("2d");
    c.addEventListener('mousemove', function(e) {
        getCursorPosition(c, e);
    })
    // Called whenever mousemove event occurs
    function getCursorPosition(canvas, event) {
        const rect = canvas.getBoundingClientRect()
        // Location of the mouse
        const x = (event.clientX - rect.left) || 100;
        const y = (event.clientY - rect.top) || 100;
        var grd = ctx.createLinearGradient(0,0,245,0);
        // Specify colors for gradient
        grd.addColorStop(0,"rgb(" + x + ", " + y + ", 255)");
        grd.addColorStop(1,"white");
        // Fill with gradient
        ctx.fillStyle = grd;
        ctx.fillRect(10,10,245,235);
    }
    // Call once to begin, empty event
    getCursorPosition(c, "");
</script>

</body>
</html>
Mathematical Snippets
Mathematical typesetting refers to displaying mathematical expressions using a standard script based on the original typesetting tool TeX for PDFs. For example:
\[\int_0^1 f'(x)\ dx = f(1) - f(0).\]
This styling beats the heck out of seeing something like int_0^1 f'(x) dx = f(1) - f(0), or even ∫₀¹f'(x) dx = f(1) - f(0). The code I used to make the expression above is \int_0^1 f'(x)\ dx = f(1) - f(0).
The library I use to inject mathematical typesetting in my Ghost blog is called KaTeX (\(\KaTeX\)). Below I describe how to add this for yourself as well. In particular, I use mathematical expressions so often throughout my blogs that I felt it was worthwhile to inject some code in front of all my posts automatically to give myself the option to use KaTeX whenever I am blogging.
<!-- Mathematical Typesetting with KaTeX-->
<link rel="stylesheet" href="https://cdn.jsdelivr.net/npm/katex@0.16.0/dist/katex.css" crossorigin="anonymous">
<script defer src="https://cdn.jsdelivr.net/npm/katex@0.16.0/dist/katex.js" crossorigin="anonymous"></script>
<script defer src="https://cdn.jsdelivr.net/npm/katex@0.16.0/dist/contrib/auto-render.min.js" crossorigin="anonymous" onload="renderMathInElement(document.body);"></script>
To do the same, simply copy and paste the above code into the Header section of Ghost's Code Injection: Settings > Code Injection > Site Header. Then hit Save.
Here is a resource that explains how to do mathematical typesetting in the language shared by \(\KaTeX\), \(\LaTeX\), MathJax, and others.
Media
Hyperlinks
While I edit my blog and wish to make a piece of text hyperlinked, I simply highlight the text and press command + K. Then I paste the hyperlink into the popup address bar and press Return to finalize the process. Another method is to highlight the text and click on the hyperlink icon that looks like two interlocked chains. Any hyperlinked text will appear as follows: hyperlinked text.
GIFs
Sometimes an image is not enough to demonstrate something, but a video is too complicated/slow. A nice compromise a GIF, because it will automatically play and loop. If I need to create a GIF, I start by using QuickTime Player to record a new Screen Recording. After recording the video, QuickTime Player will show you a video window that requires you to name the file and place it in a directory. Before saving, you can press control + T to trim the video to your desired duration. I then convert the resulting .mov files to .gif online, such as using OnlineConverter.com. Finally, I save the GIF to my device and drag the .gif file into Ghost.

If Ghost ever rejects the GIF, it's likely that the GIF is too large. I've succeeded on GIFs with fewer than 50 slides.
You can also add GIFs from a standard library by clicking + on a new block in Ghost and searching for the GIF block. You can then search throughout the Tenor stockpile of GIFs.
Screenshots
I use the shortcut shift + ctrl + command + 4 to grab a screenshot on my Mac by dragging with my mouse, which will only copy the image to your clipboard to be pasted to your blog using command + v. If you'd like to save the image first and then drag into Ghost, use the shortcut shift + ctrl + command + 3 instead.
Screenshots should be high quality. If the content you wish to copy is scalable (such as text in a PDF), I try to zoom in as much as possible into the content before capturing the screenshot. But PDFs can be grabbed in many different ways. Adobe Acrobat offers an in-app screenshot feature Edit > More > Take a Snapshot. But if we are working to copy figures that appear in a PDF, you can also use the Edit PDF feature in Adobe Acrobat to and then crop the page around the figure. File > Export To > Image > PNG, followed by Settings to change the conversion resolution to something like 600 pixels/inch. The output image should be sufficiently high quality, but you can always adjust to the resolution you need.
Metadata
Usually you can draft a better Excerpt/Search Engine Preview to summarize the contents of your post rather than just using the first few lines of the post. I think it's worthwhile to just spend a few more seconds writing this before pushing out the post!
Tags help to categorize this post for viewers who are only interested in a particular sub-theme found across blog. It also helps give readers (and yourself) an idea of what topics are represented in your blog and with what frequency. Tags need only be a single word, and do not need to be hyper-specific.
Concluding Remarks
I hope this collection of advice comes in handy for you, let me know if you want me to talk about anything else in particular!